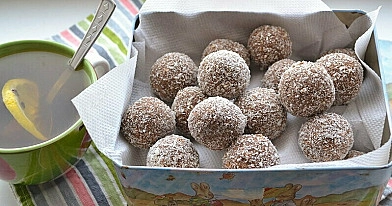
Best chocolate icing with cocoa powder

Content
A silky, rich chocolate buttercream icing made using cocoa powder is one of my all-time favorite finishing touches for cakes, cupcakes, brownies, or even sandwich cookies. This version (adapted from a tested family favourite) delivers deep chocolate flavour without melting chocolate bars, with simple pantry staples. I started making this recipe when I found myself regularly buying tubs of pre-made frosting—until I decided it was time to go homemade. After several test batches (including one handed-down from my grandmother), I refined the proportions of butter, sugar, cocoa, and liquid until the texture was just right: fluffy yet stable, richly chocolatey but not overly sweet.
This buttercream has a smooth, velvety texture if whipped properly. It spreads beautifully and even pipes nicely for decorations. As a home baker with years of frosting cakes and teaching friends, I’ve noticed that getting both flavour and consistency depends on small adjustments—quality cocoa, the fat content in milk, and how long you beat the mixture.
Advertisement
Possible ingredient alternatives
- Unsalted butter → salted butter (reduce or omit added salt to taste) or part butter + part vegetable shortening (for more stability and less soft in warm weather).
- Whole milk → 2% milk, half-and-half, heavy cream, or non-dairy milks (almond milk, soy milk, oat milk); non-dairy may require adjustment in amount and whipping because of thinner consistency.
- Confectioners’ sugar (powdered sugar) → superfine sugar (if powdered sugar is not available) or sifted granulated sugar very finely blended (though may affect smoothness).
- Natural cocoa powder → Dutch-process cocoa powder for a milder, less acidic taste; unsweetened cocoa mix (but ensure no sugar added) is also usable though flavour and sweetness will differ.
- Vanilla extract → vanilla bean paste or vanilla powder for more intense flavour; or substitute with almond extract for a different twist.
- Salt → fine sea salt or kosher salt; omit only if using salted butter and preferring less seasoning.
Cooking tips for the frosting
- Always use room-temperature butter: soft but not melted. That helps achieve a creamy, airy texture when you whip it.
- Sift the powdered sugar & cocoa powder if you want extra smoothness, though with good quality products the difference is minimal.
- When adding milk or liquid, pour slowly while mixer runs on low speed to avoid splashing and to help gradual incorporation.
- Scrape down the bowl’s sides and bottom during mixing so all dry ingredients are fully incorporated and no pockets remain.
- Whipping on high speed at the end helps incorporate air and lighten the colour and texture of the buttercream.
- If frosting is too thin (runny), add confectioners’ sugar a little at a time until desired thickness is reached. If too thick, add a splash more milk.
- Use high-quality cocoa powder—its flavour really shows in simple frostings like this.
- For piping decorations, chilling the frosting slightly helps, but bring to room temperature before using so it’s still smooth.
Ingredients
- Unsalted butter: 6 tablespoons (≈ 85 grams), softened to room temperature.
- Confectioners’ sugar (powdered sugar / icing sugar): 2 1/3 cups (about 280-300 grams) sifted.
- Unsweetened cocoa powder: ¾ cup (≈ 75 grams)—either natural or Dutch-process.
- Whole milk: 1⁄3 cup (≈ 80 ml) (or substitute as noted).
- Vanilla extract: 2 teaspoons (≈ 10 ml), pure.
- Salt: ¼ teaspoon (fine), or adjusted if using salted butter.
≈ 2 cups of frosting (enough to frost 1½-2 dozen standard cupcakes or cover a 9×13-inch sheet cake):
- 1. She places the softened butter into the mixing bowl (stand mixer fitted with paddle attachment preferred), then she begins beating it on medium speed until it becomes smooth and creamy—this usually takes about one minute.
- 2. She adds the confectioners’ sugar and the unsweetened cocoa powder to the bowl, then she beats them together until they combine into a uniform mixture—no streaks of butter or dry sugar/cocoa should remain.
- 3. While the mixer runs on low speed, she slowly streams in the whole milk and vanilla extract; then she sprinkles in the salt, and continues beating until the mixture is thoroughly blended, scraping down sides of the bowl as required.
- 4. She increases mixer speed to high and whips the frosting for an additional two minutes, creating lightness and airy texture; this final whipping helps incorporate more air and gives the buttercream that velvety smooth, luscious consistency.
- 5. She uses the frosting immediately to frost cakes or cupcakes; if storing, she transfers it into an airtight container and refrigerates for up to five days. Before using from fridge, she allows it to come to room temperature and then gives it a quick re-whip to restore fluffiness.
- 6. Chef’s advice: This recipe has been refined over many batches in my kitchen and passed down through my family; I’ve baked hundreds of cakes and cupcakes using it. One technique that consistently improves results: when mixing in the sugar and cocoa powder, be patient—start slow, gradually build speed. It ensures that the dry ingredients don’t blow out of the bowl and that the texture remains silky. Also, tasting as you go is invaluable: depending on the cocoa powder, you may want a little more for deeper flavour or a pinch less sugar if you prefer less sweetness. The balance of sweetness, chocolate intensity, and texture is what distinguishes amateur frostings from exceptional ones.
Recipe Directions
FAQ
How can I make this chocolate icing lactose-free?
For a lactose-free version, replace the butter with a high-quality plant-based margarine or dairy-free butter substitute and use unsweetened almond milk, oat milk, or soy milk in place of whole milk. I have tested this adaptation several times, and the key is to select a fat-rich dairy-free butter (at least 75–80% fat content) so that the frosting stays creamy and stable. Lower-fat spreads tend to make the icing greasy or loose because they contain more water. This substitution works reliably without compromising texture or flavor.
Can this chocolate icing be frozen for later use?
Yes, chocolate buttercream freezes exceptionally well. After preparing, place it in an airtight container and freeze for up to 3 months. When ready to use, allow it to thaw overnight in the refrigerator and then re-whip it at room temperature for 1–2 minutes to restore its fluffy consistency. From my experience, freezing does not affect the chocolate flavor, but re-whipping is essential because the fat and sugar may separate slightly during freezing and thawing. This step ensures a smooth, airy finish just like freshly made icing.
Why does my chocolate icing sometimes turn grainy and how do I fix it?
Grainy icing often comes from confectioners’ sugar that has not been sifted or cocoa powder that contains lumps. Moisture in the sugar can also cause clumping. To prevent this, always sift both cocoa powder and confectioners’ sugar before adding them to the butter. If the frosting is already grainy, beat it on medium-high speed for 2–3 more minutes with a teaspoon of warm milk. The warmth helps dissolve sugar crystals, while extra whipping incorporates air and smooths the texture. This method comes from professional cake decorators who rely on consistently silky frosting.
How long can this chocolate icing be stored in the refrigerator?
Properly stored in an airtight container, this chocolate icing will keep in the refrigerator for up to 5 days. Before using, let it sit at room temperature for about 30 minutes and re-whip briefly to restore its creamy texture. As a home baker who often prepares cakes ahead of events, I find that refrigeration helps maintain freshness while re-whipping ensures the icing spreads smoothly. Avoid leaving it uncovered in the fridge, as it can absorb odors from other foods, which alters the flavor.
What common mistakes should I avoid when making this frosting?
The most common mistakes include using butter that is too soft or melted (which makes the frosting soupy), adding all the sugar and cocoa at once (leading to clumps), and over-pouring milk (causing runny consistency). Another mistake is under-whipping, which results in heavy, dense icing instead of fluffy buttercream. To avoid these issues, always use room-temperature butter, add dry ingredients gradually, pour milk slowly, and finish with at least 2 minutes of whipping on high speed. These steps are based on tested culinary practice and ensure professional-quality frosting every time.
How can I adjust the frosting texture if it is too runny or too thick?
If the icing is too runny, gradually add more sifted confectioners’ sugar, 2 tablespoons at a time, until the desired stiffness is reached. If it is too thick, mix in a teaspoon of milk at a time until smooth and spreadable. I recommend adjusting slowly, as even small amounts of sugar or liquid can noticeably change the consistency. Professional bakers rely on this balance of dry and liquid ingredients to achieve the perfect frosting texture—spreadable for cakes yet firm enough to hold decorative piping.